


How to create a contact page with a form in WordPress

Now we will learn how to create the typical contact page with a basic form.
WordPress, by default, does not come with any option to generate a contact form, so we will need a plugin that allows us to create it.
🔧 Install and activate the “Contact Form 7” plugin
Remember that here we have a 🔌 list of essential plugins for WordPress.
Also remember 🔧 how to install a plugin in WordPress?
Well, in this example we will install “Contact Form 7“, which is a plugin for creating contact forms, lightweight, quite simple, and also free.
⚙️ Initial configuration of the contact form
Once “Contact Form 7” is installed and activated, we go to “Contact → Contact Forms“, an option that was not previously there 👀:

We will have an example form already created called “Contact form 1“. We can use this one to start working, so we are going to edit it.
🧪 Customize our form fields
Once inside, a screen like this will appear showing:
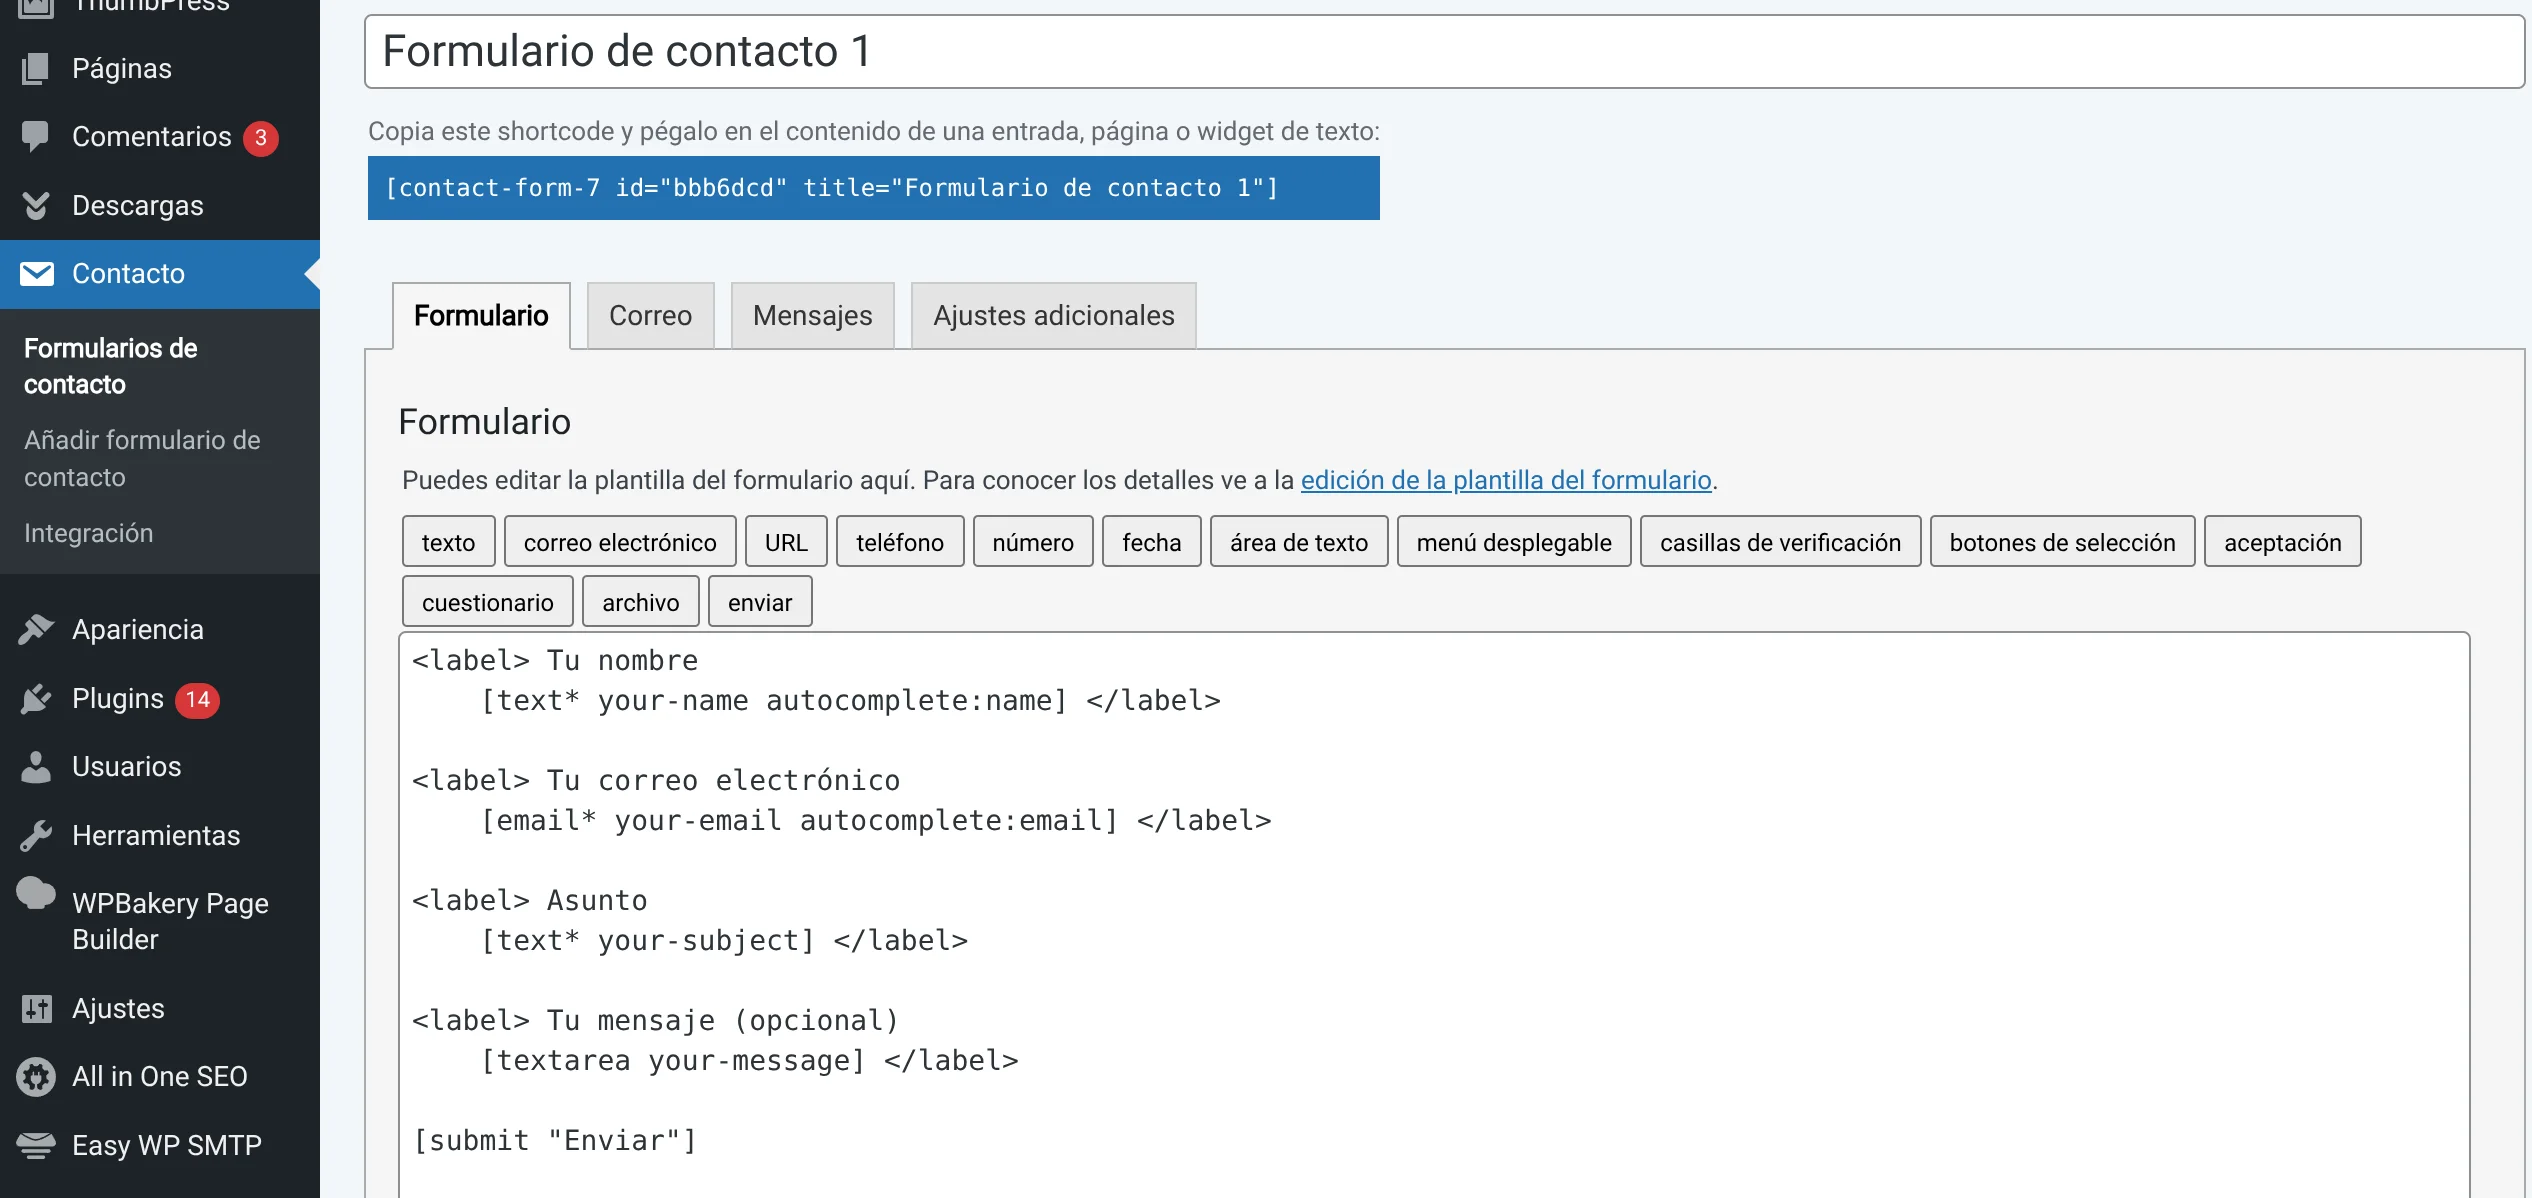
📣 Form title: “Contact form 1”.
🧩 Shortcode: which we will copy and paste wherever we want our form [in the image, it is what appears in blue between brackets].
⚙️ Tabs with more options: Form, Mail, Messages, Additional settings.
🎙️ Available form fields: These are the buttons that appear for “text, email, url, tel, number, etc”.
🥁 Form HTML code: This code will “draw” our form. We can change the order of the fields, the text of each field, whether they are required or not, change the text of the “Send” button, etc.
🧬 Introduce a new field to the form
For this example, we are going to introduce a new field called “Phone” so the user can enter it.
In the code, click between the [shortcodes] “Your email” and “Subject” and press “enter” on the keyboard to make space for the new field we are going to insert.
Click the button called “Telephone” and this popup will appear:
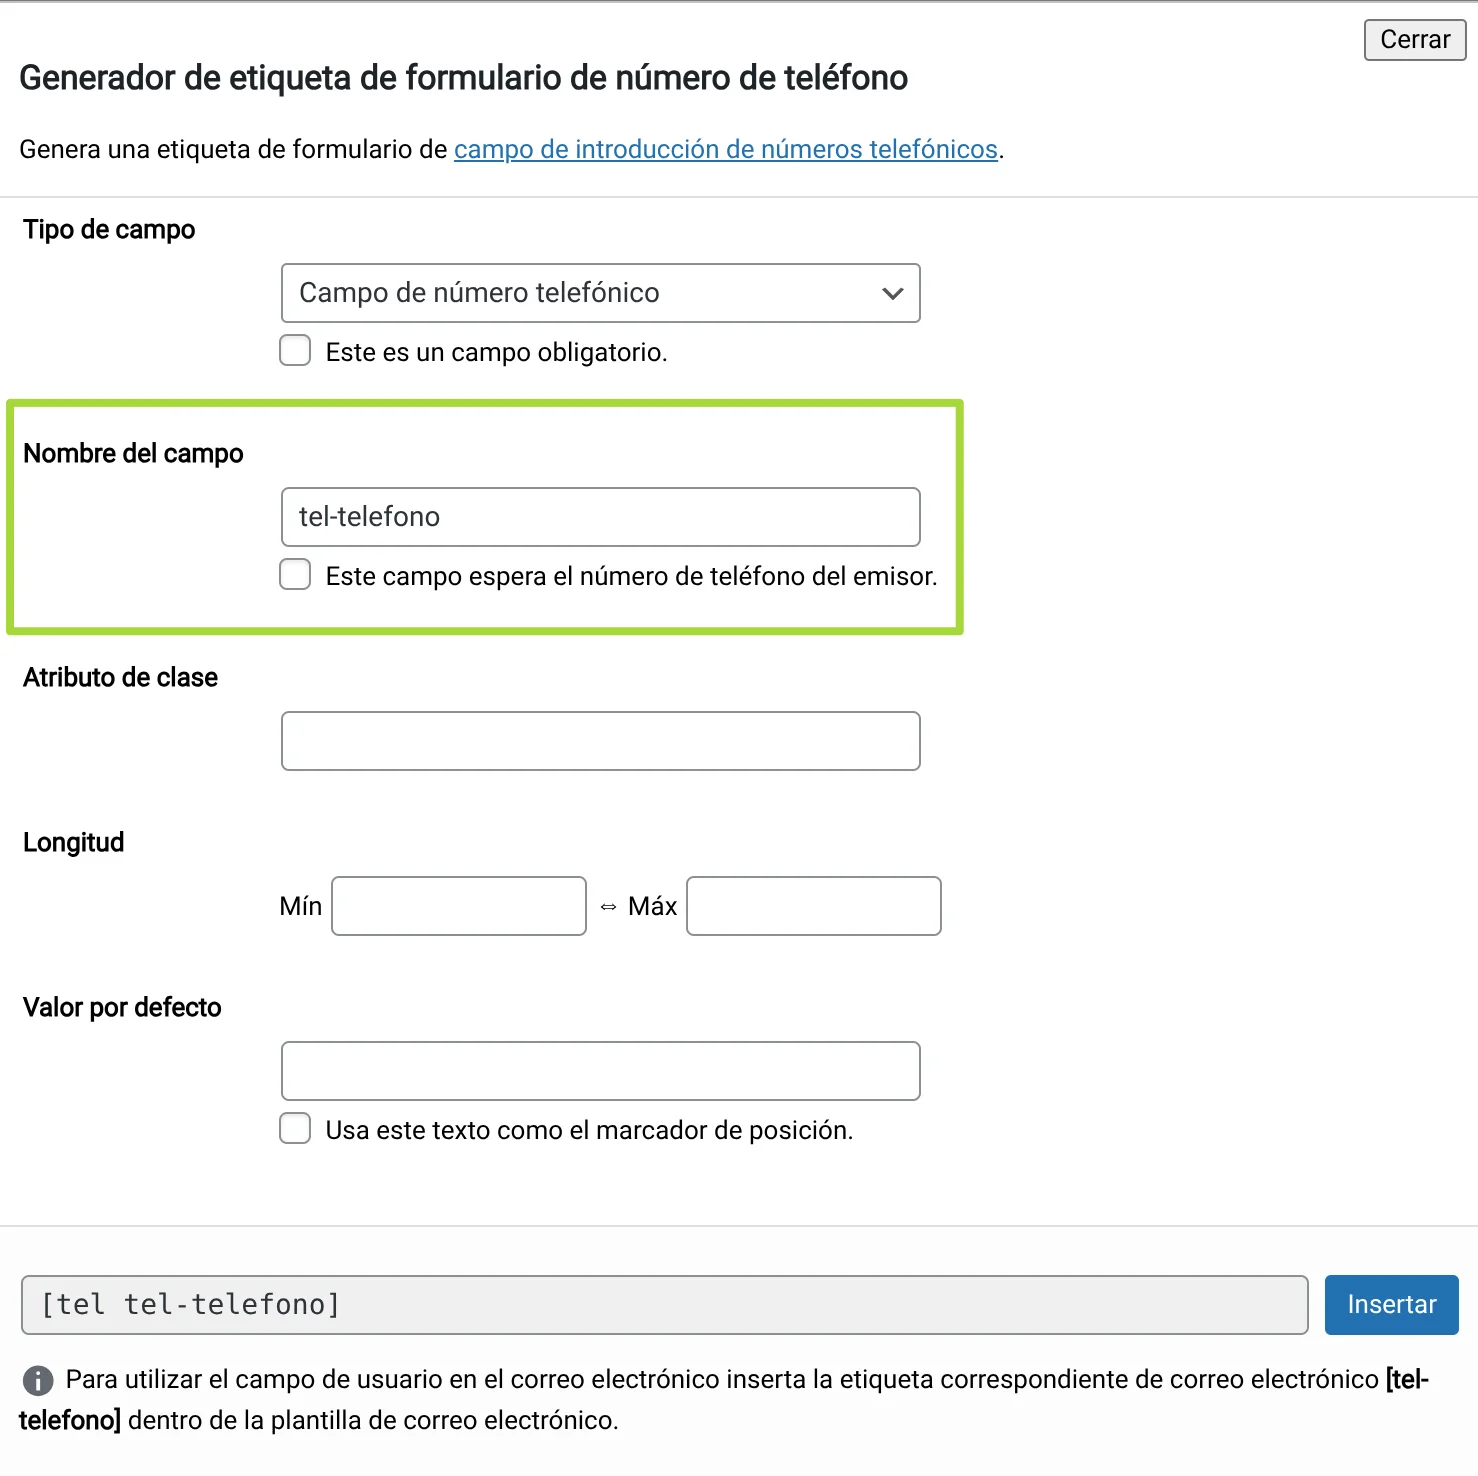
In “Field name” we are going to change it to ☎️ “tel-phone” to make it easier for us to identify, and click the “Insert” button.
The new shortcode for the phone field will appear:
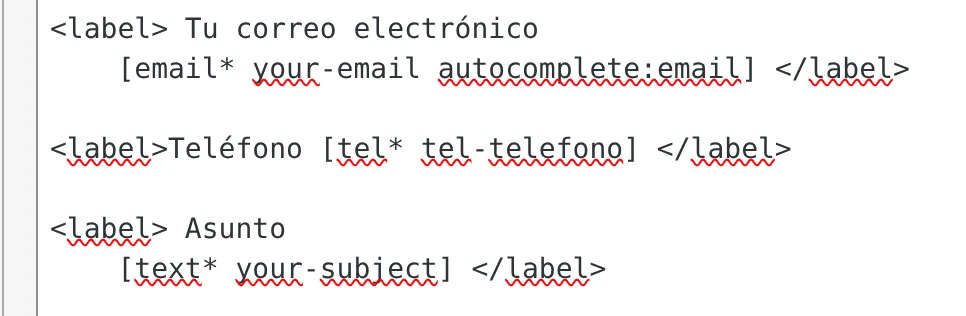
If you notice, I have placed an asterisk * at the end of the field type: [tel* tel-phone]
The asterisk indicates that the field will be required. It can also be set from the previous popup.
I have also written a text “Phone” for the user to see.
I have wrapped everything between <label></label> tags. What does this do? This wraps the text “Phone” and the field in such a way that if the user clicks on the text, it will directly point to the box so the user can type inside it. If the “label” tags are not placed, if the user clicks on the text “Phone”, it will simply select the text but not the box. Try it to see the difference between having the <label> tags and without <label>.
📨 Configure the email that will reach us from the user
We go to the “Mail” tab:
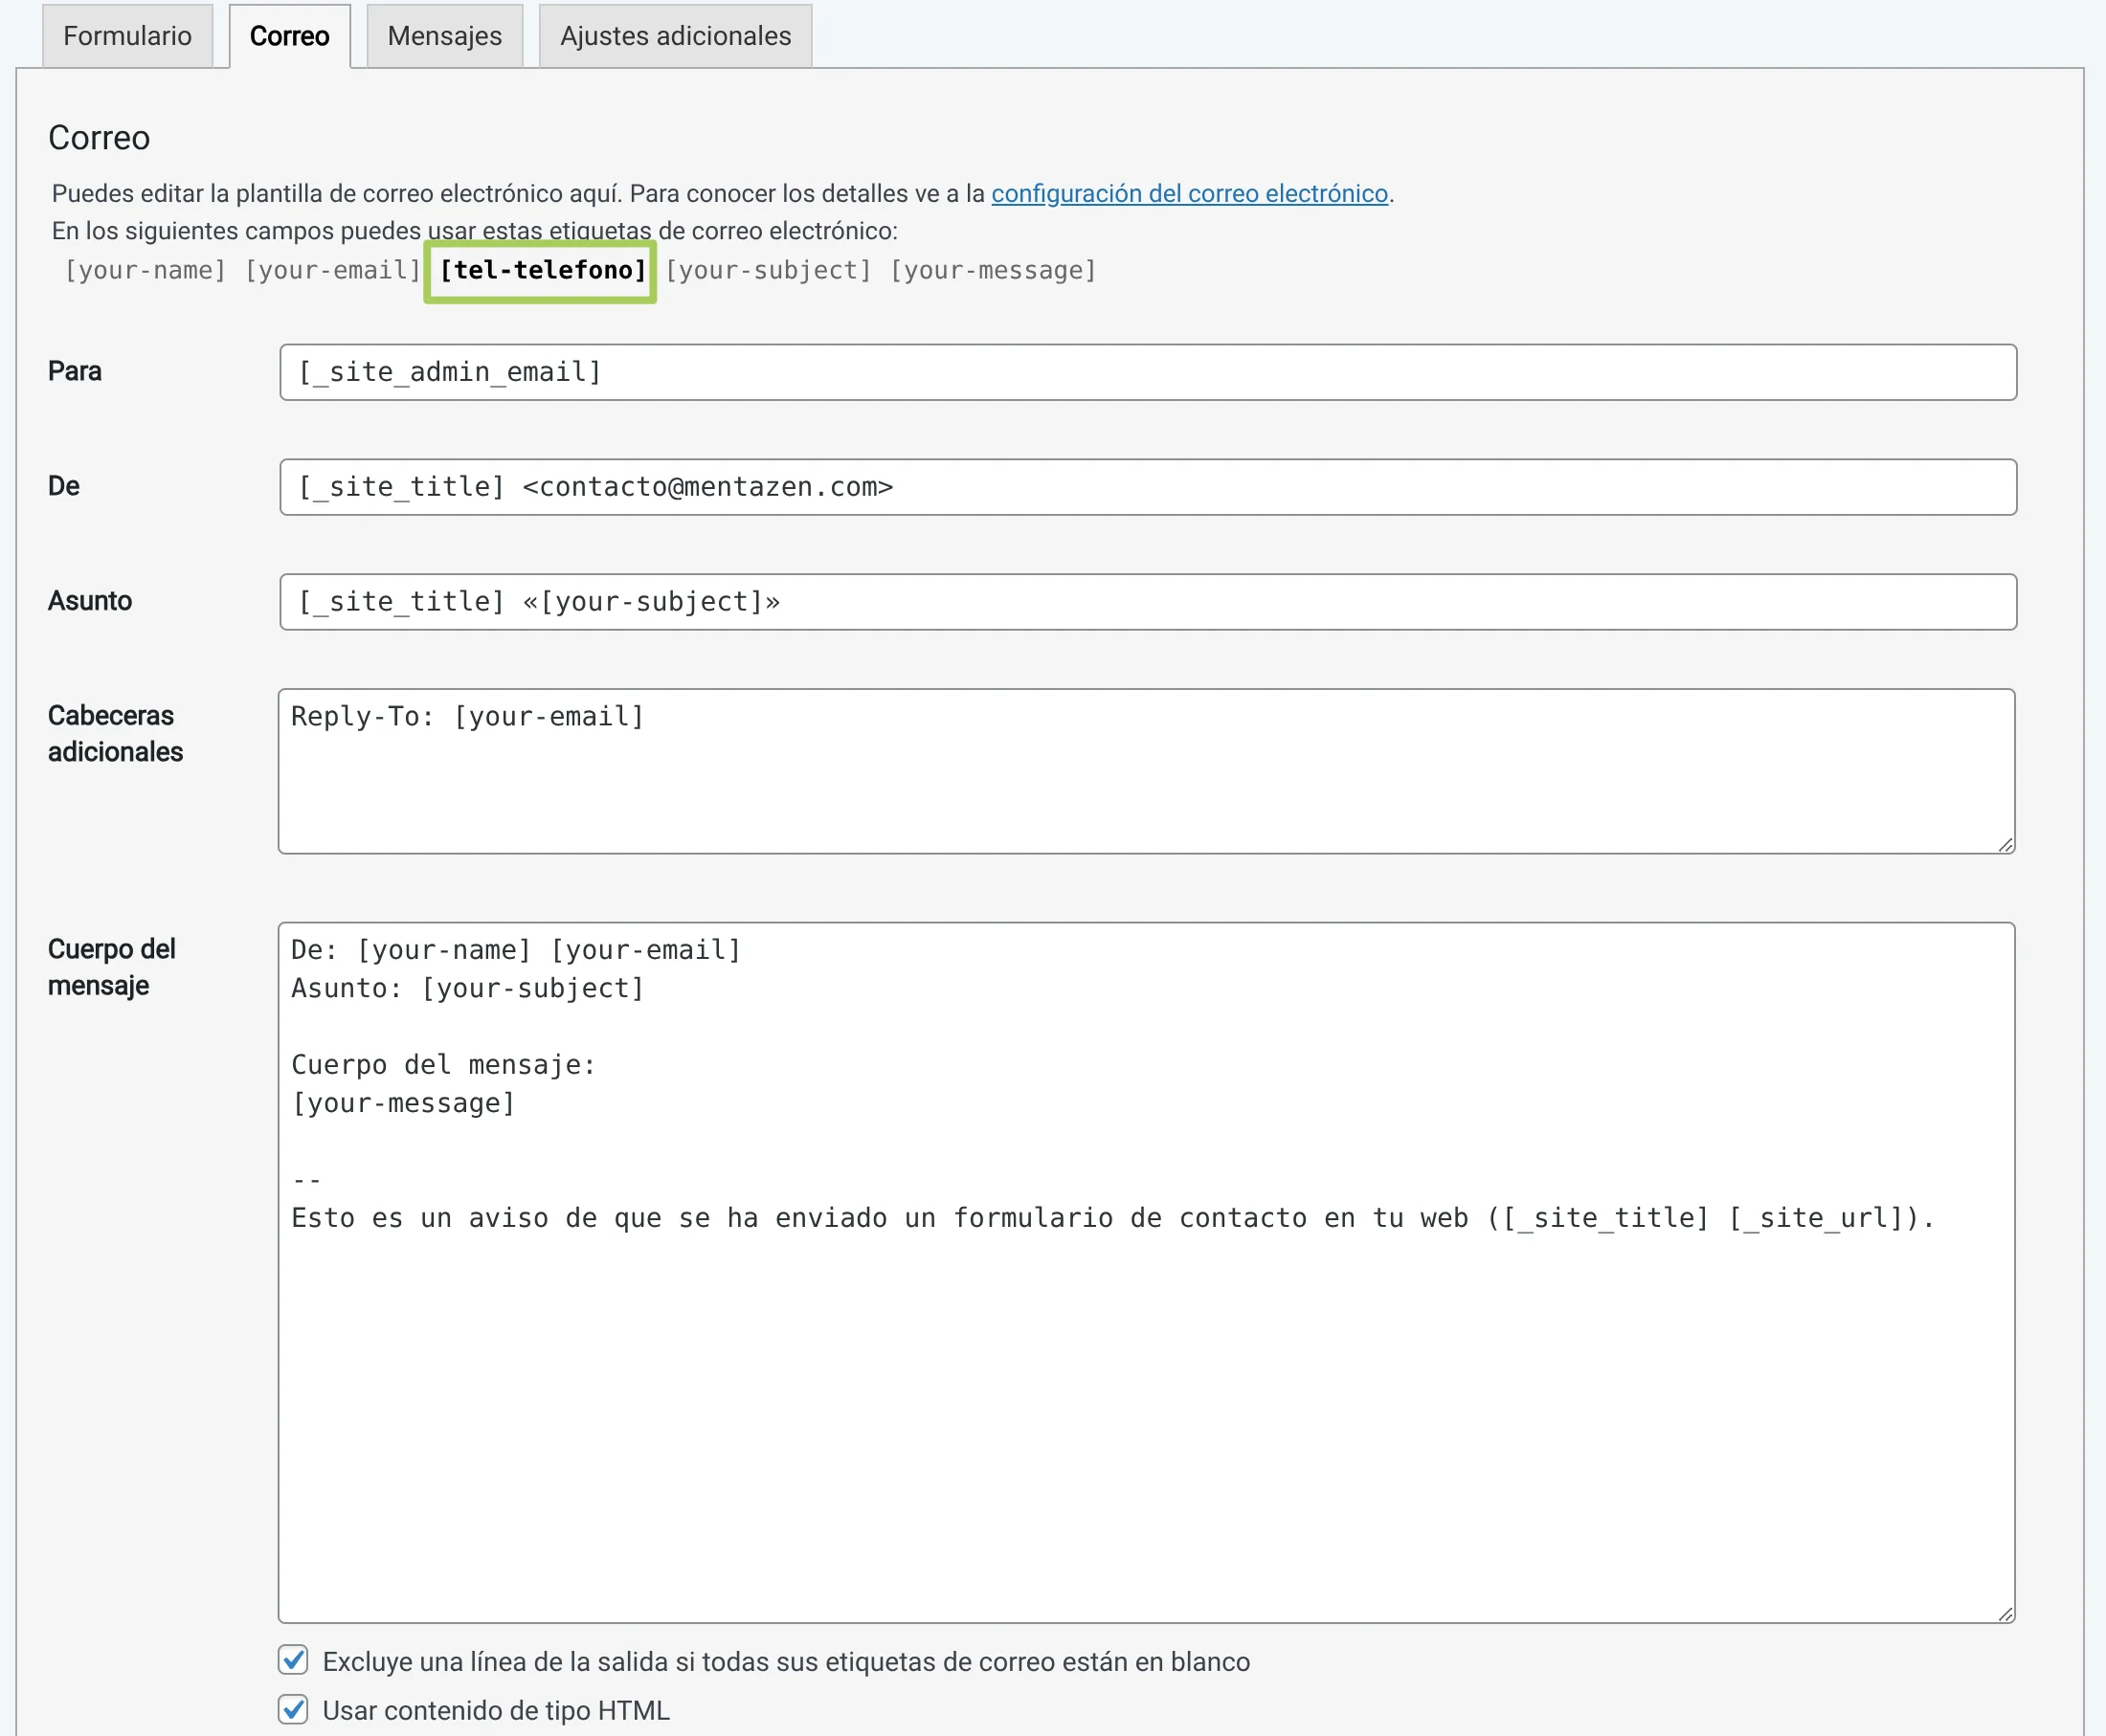
In the part marked in green, you will see our phone [shortcode] that we created and it appears in bold.
This means that the field is created in the form but we are not using it in the email that will be sent to us.
Therefore, we are going to copy and paste the [shortcode] into the body of the email message, along with the text “Phone”:
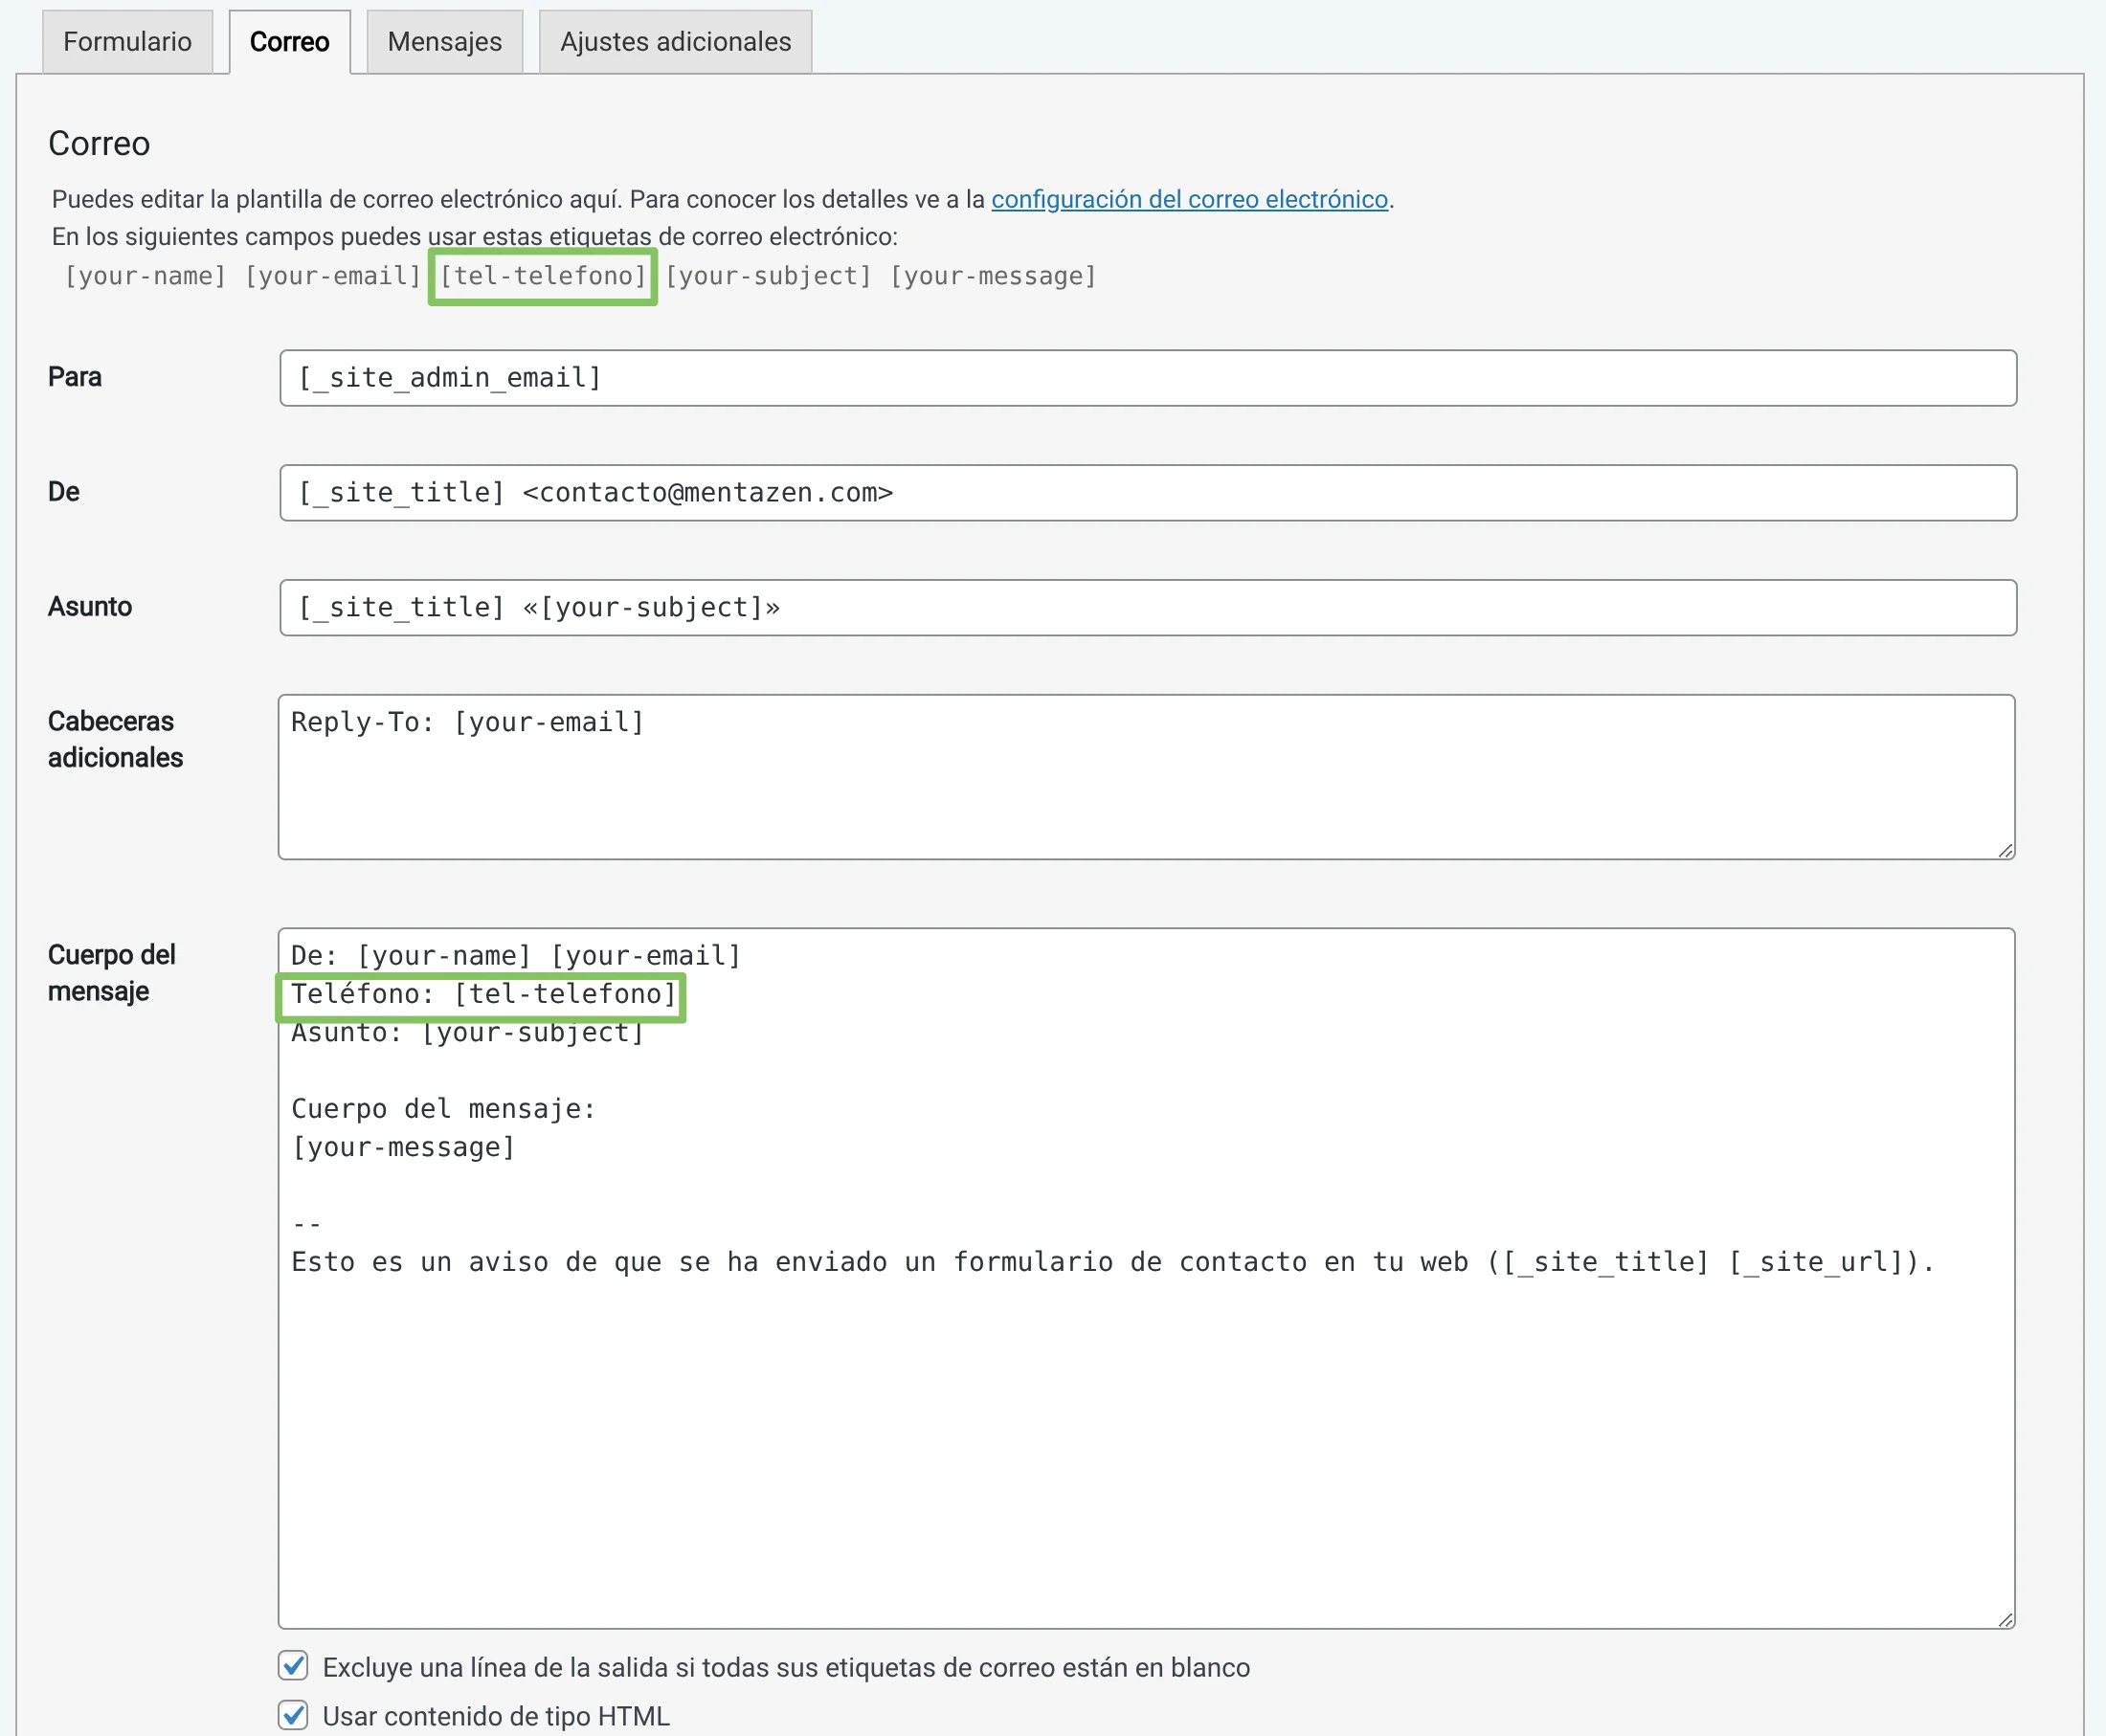
When we receive this email, the [shortcodes] will be replaced by the content that the user has entered.
🧓🏾 In the “To:” section: You must put the email address where you want the email to arrive.
If you leave the default [shortcode] that appears, it will arrive at the administrator email that you have configured in your WordPress.
🧑🏽🦱 In the “From:” section: You must put the sender’s email address.
👉 IMPORTANT: This email must have the same domain as the website so it is not considered SPAM. That is, if your website is “mentazen.com”, the sender’s email should be, for example, “xxxxxx@mentazen.com” and not “xxxxxx@somethingdifferent.com”
Save the form, now you will see that the [shortcode] no longer appears in bold, that’s because we are now using it in the email.
📖 Change the form’s information, error texts, etc.
We go to the “Messages” tab:
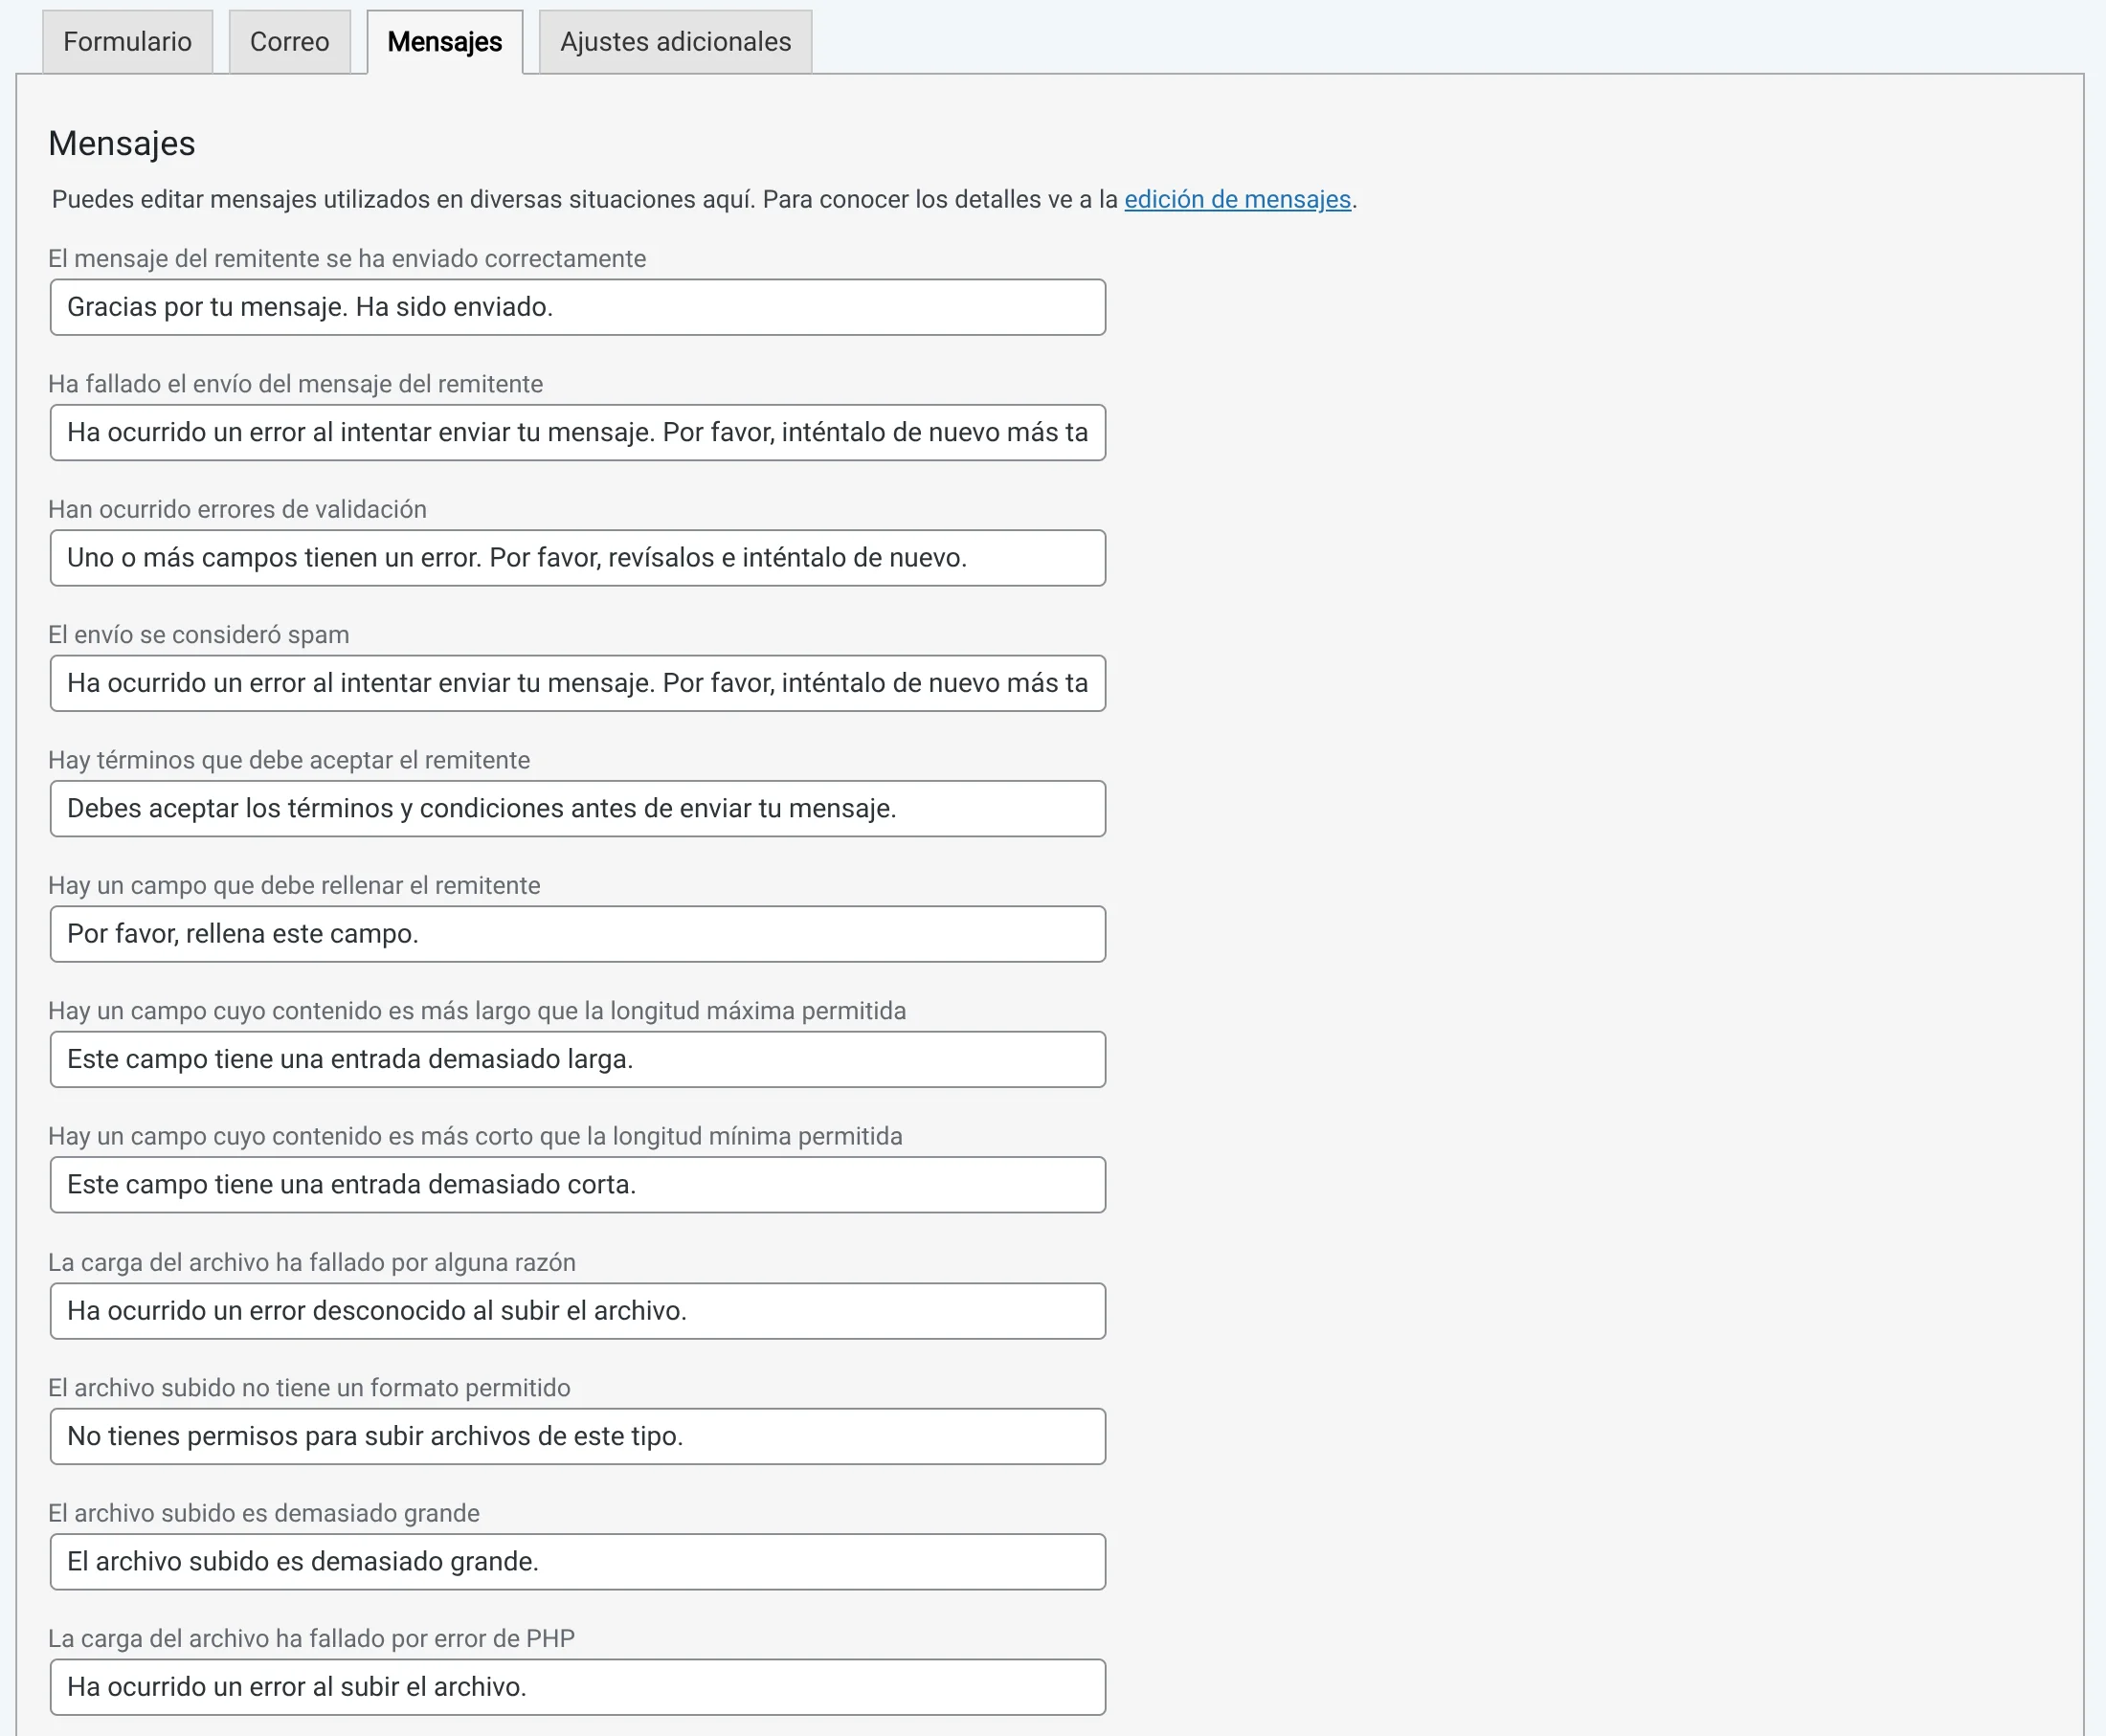
If you wish or need to, here you can change the message that appears to the user when successfully sending a message “Thank you for your message. It has been sent.” and other types of messages like notices or errors.
❇️ Tip: Changing these texts is also useful when we want to translate a website into different languages, creating a different form for each language and translating the texts.
Finally Save the form.
📬 Insert the form into our Contact page
We will see the [shortcode] of our form, which will be similar to the one I mark in green, COPY IT!:
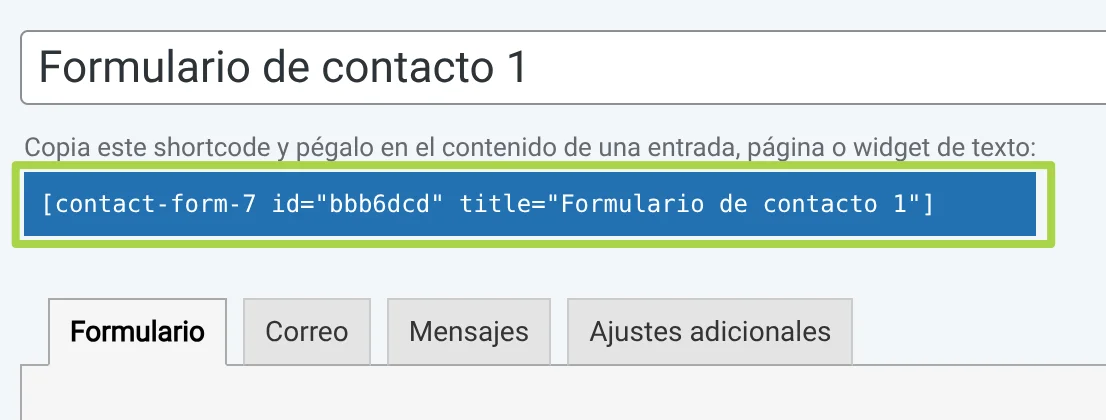
You can also find it from the initial screen where all the forms appear “Contact → Contact Forms”

Each form, in its [shortcode], will have a different id=”xxxx”, which will uniquely identify each form. Therefore, your form may have a different id.
Alright, so with the [shortcode] copied, paste it into your “Contact” page in the area of the content you want, along with any text you want to add like “This is our form”, save and view your page.
It should look something like this:
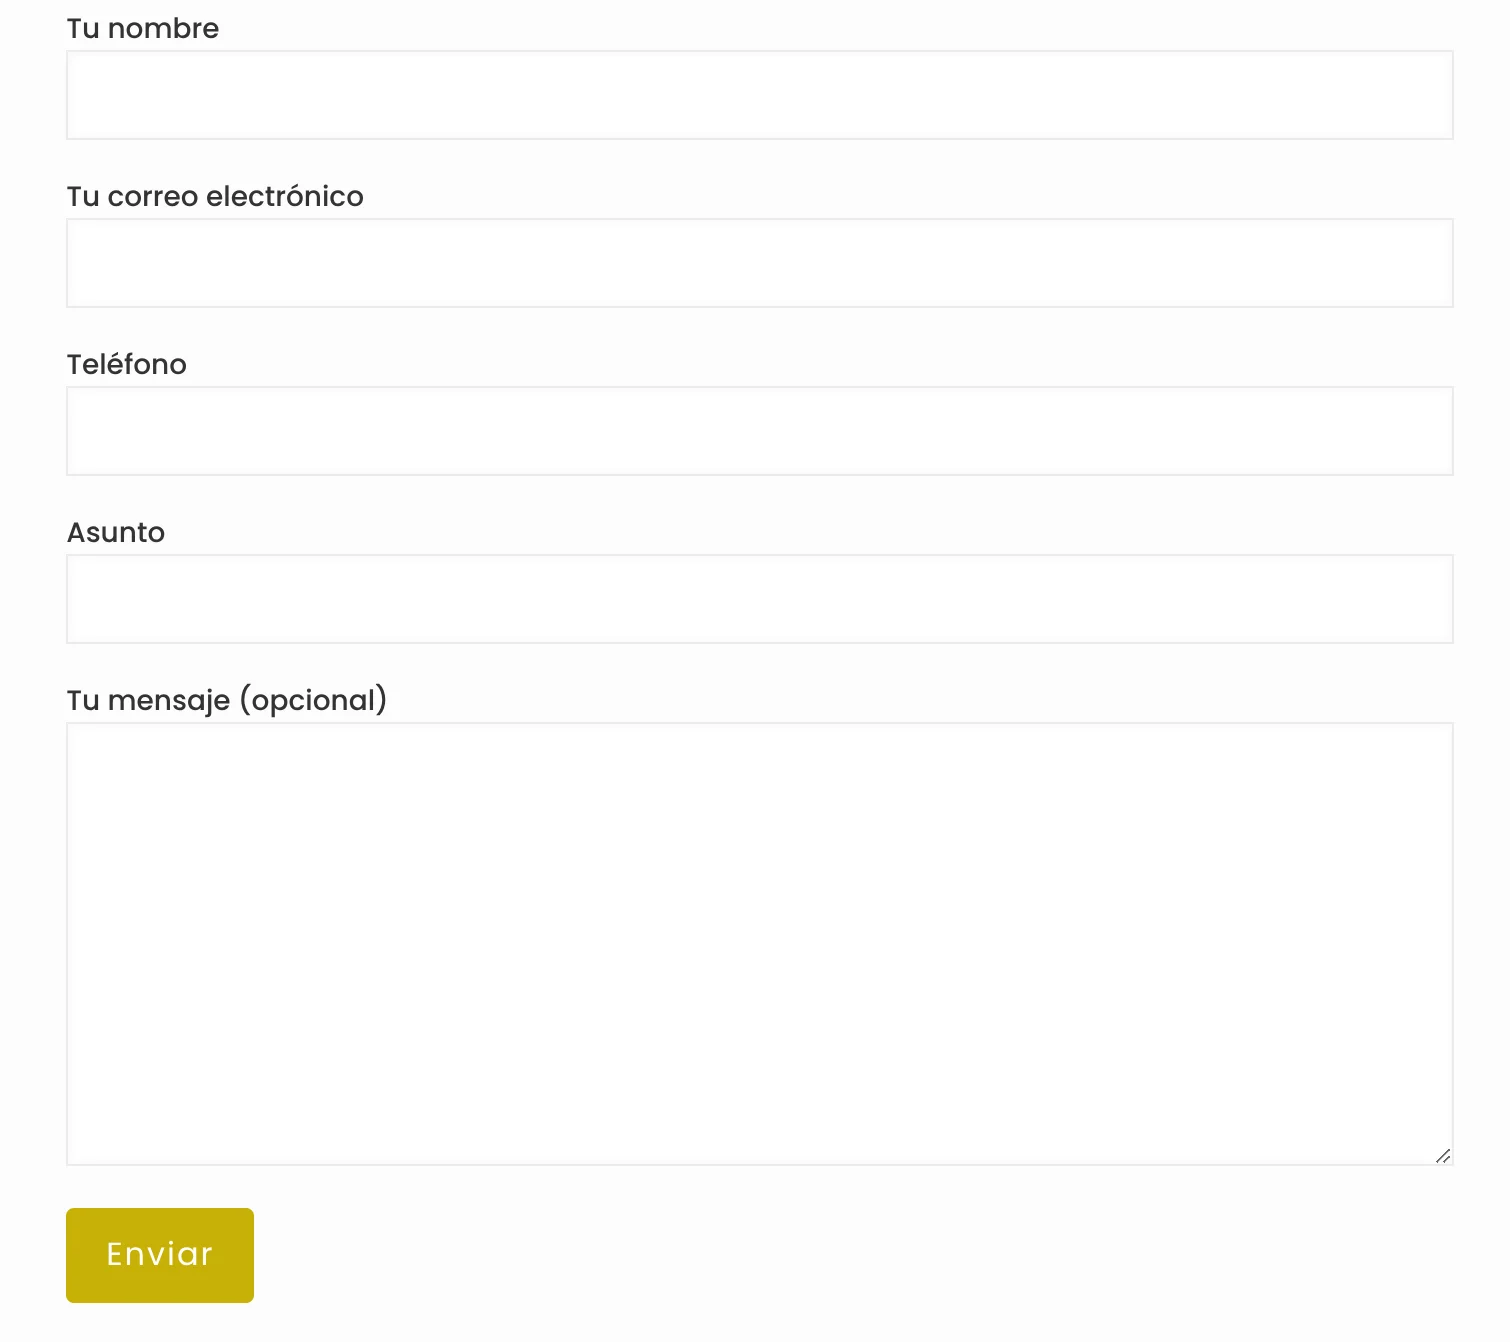
Of course, the appearance can be totally different, since it depends on our installed Theme. The important thing is that our fields appear.
❇️ Tip: When a field is required, it is advisable to put some identification like an asterisk *Phone, and put a phrase like “*Required fields”, so the user understands that it will be a required field.
Done! 🎉 We now have our form. Now if you try to send it, it might work or not. Why? Well, because we probably have to configure the SMTP server, which is the configuration used to send emails from the website.