


How to create a static home page and a blog page in WordPress

Below I explain how to create a homepage and another page to aggregate article posts (blog), plus a custom main menu with both sections in said menu.
🏠 Set a page as Home and 📰 a page as Blog
With the 2 pages already created from “Pages → All Pages” with the title “Home” and “Blog” respectively.
In the content of “Home” write any text as an example and save.
👉 If you try to view the created Home and it doesn’t show, or you see other content, it’s because you have installed a Theme that has a customized and already structured Home that prevents you from creating your own Home. Therefore, you will have to change the Theme (for example, any of the standard WordPress ones).
In the content of “Blog” do not write anything, it will normally not appear, since it is a dynamic page that will display the list of our news and not what we put in the content.
Now we go to the following path:
📍 Location: Settings → Reading
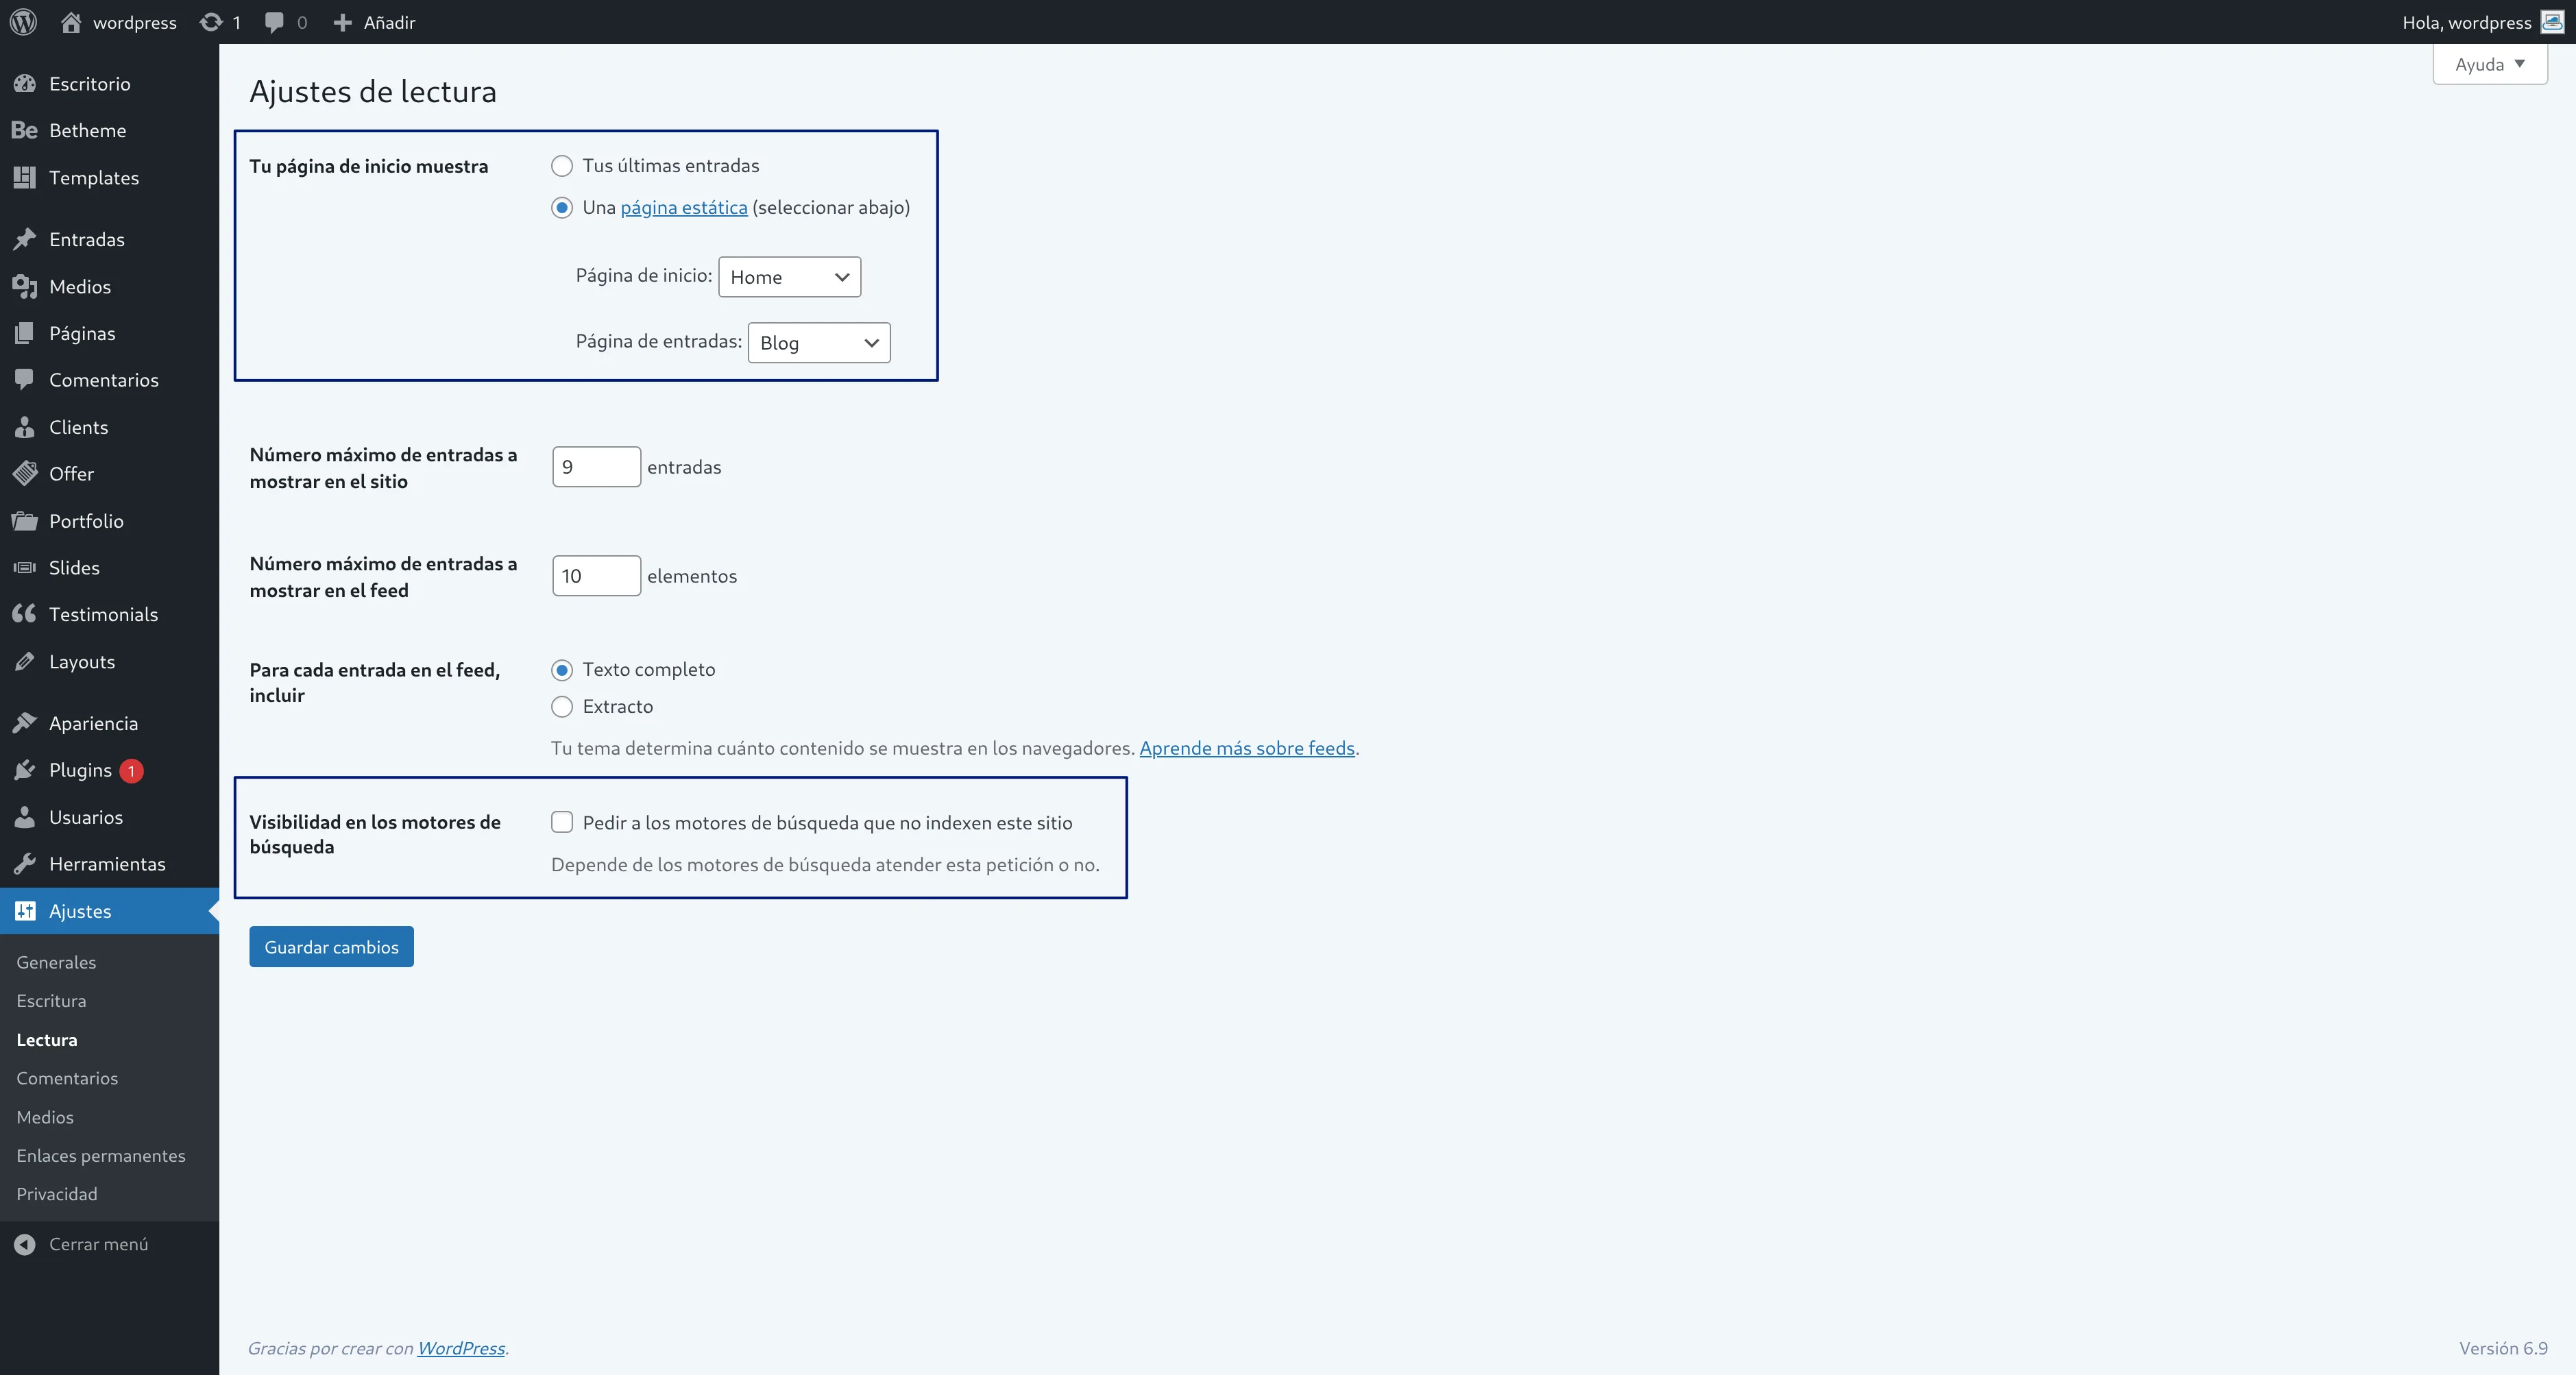
Remember that where it says “Your homepage displays”, the behavior will change in the following ways depending on what we select:
- Show “Your latest posts” (Functions like a blog, meaning posts will be seen directly when entering the website; this is the default setting which we don’t want now)
- Example: all articles would appear on the main screen “http://localhost/mywebsite”
- Show “A static page” (one page as the homepage and another page as the news page).
- Example: at “http://localhost/mywebsite” our custom text that we put on “Home” would appear, and at “http://localhost/mywebsite/blog” all our article posts.
👉 The second option is ideal for corporate websites, online stores, and complete pages with multiple sections that are not just a blog.
Leave the option ☑️ “A static page” checked, and select “Home” as the Homepage and “Blog” as the Posts page.
Click the “Save Changes” button.
When you enter your website again on the public side, you will now see the “Home” page with the text you wrote “http://localhost/mywebsite”, instead of the posts page.
The posts page will now be at the path “http://localhost/mywebsite/blog”
Every time you create pages, WordPress will automatically generate a menu with all your created pages (in this case “Home” and “Blog”) and all your generated pages will be added unless we create a “Custom Primary Menu”. Normally, we are not interested in showing all pages in the main menu (for example, “Legal Notice” pages are better placed in the footer and not in the main menu).
🧭 Creating your Custom Primary Menu
That automatic menu that WordPress generates is useful when starting, but to have TOTAL CONTROL of our menu, you must create your own custom menu.
📌 Steps to Create your “Primary Menu”:
- Go to
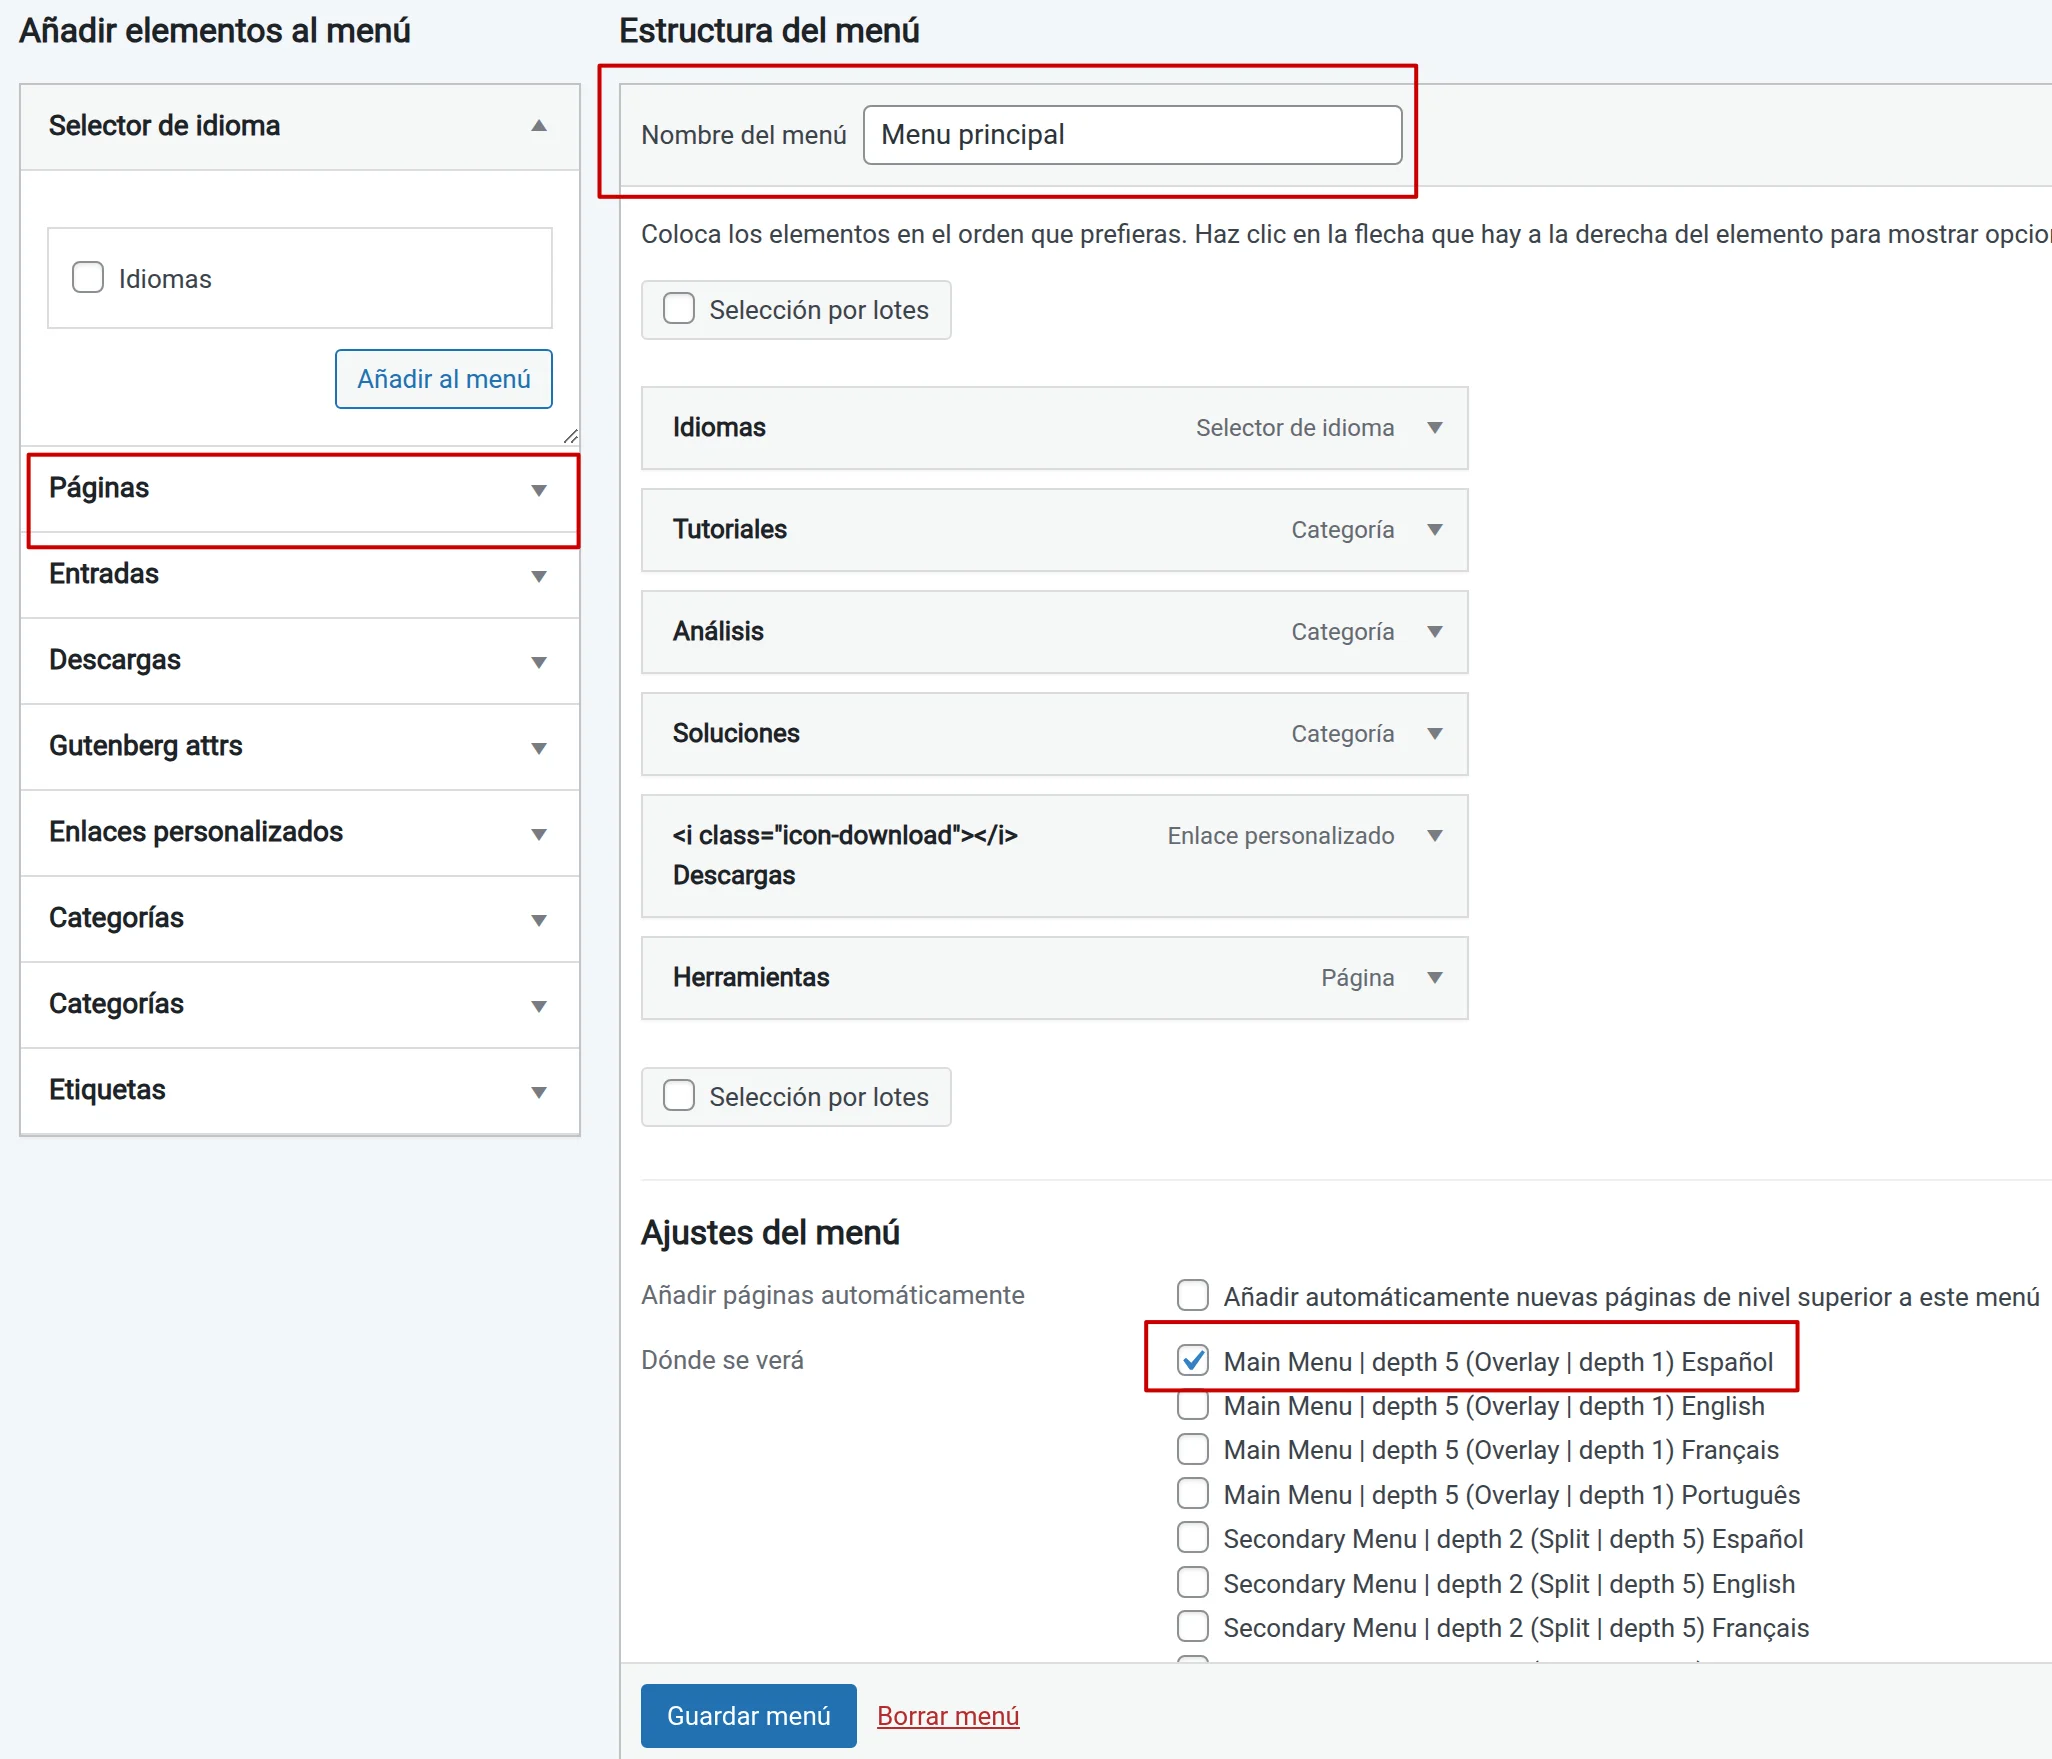
Appearance → Menus. (the image used is merely representative) - Create a new menu: Type a name, for example: “Primary Menu” and click the blue button “Create Menu”.
- Add pages: From the left column, under “Pages” select the pages “Home” and “Blog“. Click “Add to Menu“. They will have been added on the right side 👉
- Organize and structure:
- Drag and drop the items to order them (e.g., Home – Blog). Try it, you’ll see you can drag and drop to organize them.
- You can create subsections by dragging an item slightly to the right, below another one. You’ll know it becomes a subsection because it will be indented relative to the main section. That’s how you create dropdown menus!
- Specify that this will be your primary menu: Below in “Menu Settings” in the “Display location” section you will find a list indicating various positions to place the menu. Depending on the Theme, it may show more or fewer positions (primary, secondary, footer, left, split left, split right, etc). Check the ☑️ called “Main menu” or equivalent. This replaces the automatic menu and applies your custom menu.
- Save the changes by clicking the blue button “Save Menu”.
Done! 🎉 Now if you go to the public part of your WordPress you will see that the main menu appears exactly as you have configured it.
You can play around by creating more pages “About Us”, “Contact”, etc and change the order or create a dropdown with a subsection and see each change.